Monday, February 28, 2011

Part 2 - Bathroom Finished


Just a few pics of my dh removing the vanity. We did have plans to save the sink and toilet and donate it to the local habitat for humanity store, but sadly the sink was chipped quite badly when dh removed the vantity top, we have managed to save the toilet and the light fixture so we will drop them off some time soon. More pics of the before can be seen here


So here is my dh doing a little bit of demolition, what fun that was, you know that moment you get when you think what are we doing? well this is that moment for me, especially when the vanity unit was removed and we found out it had not been tiled all the way to the wall, this could have been a complete disaster but lucky enough there were some tiles in the basement that matched. So all it meant was we were going to have to do a little bit of tiling, so off we went to Menards to get some tile grout and adhesive and a tile cutter. It all worked out OK in the end


So here it is, our new bathroom all finished. I am really pleased with the result. This is the new changes we made:
WHITE Toilet Menards
vanity unit,
silver knobs Menards
white vanity top.sink Menards
Taps (faucets)
Skirting boards (I think these are called baseboards in the US)
Mirror from TJ Maxx
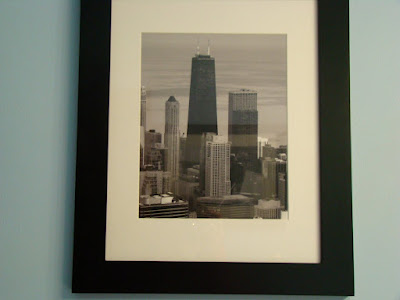
Artwork prints black and white and matted
Light fixture from Menards
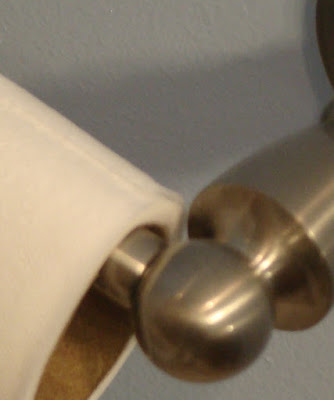
Toilet roll holder
Towel rail
Light switches and sockets changed from cream to white with new brushed silver backplates
Basket TJ Maxx


I took these photos a couple of years ago, but never had anywhere that I really wanted to put the. So when we could not find any artwork we liked to put in the bathroom I decided to convert these pictures to B&W.



Just for fun here is a before and after shot side by side;


BEFORE AFTER


I have posted this on the link party over at My uncommon slice of suburbia


Saturday, February 26, 2011

A little sneak peak of what I have been up to, more to follow so keep a look out!

Posted by Picasa

Friday, February 25, 2011

Bathroom Remodel Part 1

Last weekend was a busy weekend! Saturday lunch time on the spur of the moment we decided to remodel our 1/2 bath. Ever since moving into this house the one thing that I really hated was the BROWN yes I said BROWN toilet and sink, and the horrible tiling on the vanity unit, that no matter what I did I could never get looking as clean as I would like.

I really do not like anything other that a white toilet in a bathroom. It has really been bugging me for ages and after a trip to home depot and Menard's we decided that we could tackle this project!

We bought a new vanity unit, new vanity top and new toilet. ALL IN WHITE and off back home we went.
As soon as we had unloaded our new purchases into the house we started our demolition. I decided that the old units would be OK painted up with a new top and that it would be nice to recycle them and use them in my craft room. So here are the before pictures, not too bad but, livable I guess but it definitely needed updating
See the horrible tiles, just imagine what the grout looks like. I like the big mirror, however, it has started to peel at the bottom where water gets splashed when the boys wash their hands, can you see just above the tap (faucet) yes we are fanatical hand washers in this house
See what I mean about the brown toilet? It is much, much worse in real life.

So this is a task that is doable!!! However, it was not made easy by the fact than we are English living in the US. You may ask yourself what is the girl going on about. Well the difference in American English and British Engli sh can sometimes be very confusing when it comes to buying tools and things for diy. I will explain more in my next post.
Posted by Picasa

Thursday, February 17, 2011

Stash and my first lesson in Applique

Yesterday was a fun day for me. I managed to do a little bit of stash shopping and added some more fabrics to my little pile of fat quarters that I am collecting for my next project. This is my whole collection so far. Surprisingly, green is my least favourite colour, but I really like the combination of aqua and green. So I thought I would give it a go and see how it all turns out.


I went to my local quilting shop yesterday and met up with a few of the girls. We had arranged to meet up so that we could be taught by one of the girlie's how to do applique. These are the fabrics I chose for the block I am making.


I had a fun time and this is what I got up to. This was an interesting technique that I have never seen done or read about before. I cut out the leaf template from some myler sheet and then used that to cut out my material, I then positioned the myler template on the cut out leaf and dabbed spray starch onto the seam allowance and ironed it over the template. I am not sure if this makes sense, so I will upload a little tutorial soon. This made sure that the leaf had a really neat crisp edge.


Next lesson will be the actual sewing part, I am not looking forward to that part as my hand sewing is certainly not the neatest.

Monday, February 14, 2011

Happy 14th Birthday on the 14th


Today is my baby's birthday, he is 14 today. Not a baby anymore but to me he will always be my baby.


and not forgetting it is valentines day, I wish you all a Happy Valentines Day

Thursday, February 3, 2011

Union Jack Pillow and Blogger's Pillow Party

Today I made a pillow from the union jack paper piecing I did last week. I just added a red and blue fabric border around the flag and then used a bright red fleece for the back of the pillow. As you can see I did an envelope closure, so I can easily take it off and wash it. I used a zig zag stitch to give it a little bit more interest on the back, this is for my sons room, so I couldn't do anything too fussy to it!!!!
If you didn't know, the inspiration behind this pillow is the fact that I am English and I just love the design of the union jack, such a cool design. I think it will go well with my 1st quilt I am in the process of making. I just did a monochromatic theme instead of the traditional colours. A few firsts with this pillow, 1st paper piecing I have ever done, and the 1st pillow I have ever made.

I'm entering this pillow into the February Blogger's Pillow Party over at Stitched in Color.


Blogger's Pillow Party


Each month you can enter one pillow you've made (in the last three months), and a guest judge will choose a winner!
February's judge is Rita at Red Pepper Quilts!! Did I mention the winner receives a fantastic prize? A 16 fat quarter set the Delilah range by Tanya Whelan donated by Fresh Squeezed Fabrics!


Wednesday, February 2, 2011

Merged blog

Ijust merged my blogs together, wish I had realised this sooner as I was posting on 2 blogs, crazy.

Cross stitch

One of my very first hobbies as a child was cross stitch, I think I was about 8 years old when I learnt how to do it properly and on and off over the years I have made quite a few things. These are some of my favourites that I thought I would share with you today. Please excuse the angle, I had a hard time trying to take decent pictures because of the glass.

I stitched this cross stitch years ago when I dislocated my knee, for 6 weeks I was in a plaster cast from my ankle to my groin and couldn't really do much of anything. So this cross stitch kept me sane during a really uncomfortable time in my life. I was so uncomfortable with the cast on that it was very difficult and painful. Many times I woke up on an evening unable to get to sleep, so I would sit and do some cross stitch until I couldn't see and felt so tired I would sleep. This is probably the largest cross stitch that I have ever completed and certainly my favourite.


This sunflower is stitched on black aida, it was really difficult to do as I couldn't see the holes.

Posted by Picasa
Related Posts Plugin for WordPress, Blogger...